DevOps Log 2: Setup Fargate Service without Public IP
This article will describe the process to setup Fargate tasks with only private IP, using images stored in a private registry.
Disclaimer: I am not a security expert, in fact my computer network knowledge was even picked up during work. I realized as the need of designing your own architecture grows, I will inevitably fill in the holes in my computer science theory. I merely receive a goal, research the tools and theories behind, and execute it to the best of my ability.
Before covering the main steps, there are some important concepts one needs to know in the AWS, besides Fargate related concept.
-
VPC
-
Subnet
-
Route table
-
Internet Gateway
-
NAT Gateway
All related concepts could be found in the official AWS documentations
Overview
For Fargate to pull images from private registry, it needs Internet access. I initially would think that ECR, the private registry provided by AWS, would provide some sort of intranet access so we don’t have to go through Internet, but I did not find such route.
For a task running in Fargate to access the Internet, it either needs a public IP, which could be enabled during service configuration, or more securely, resides in a private subnet that routes outbound Internet request to the etwork address translation (NAT) gateway, and then the Internet Gateway (IGW).
This approach obviously provides better network control, monitoring and security protection.
Configure your network (Optional)
This step is optional if you have already did it. According to AWS docs here
If you are using Fargate tasks, in order for the task to pull the container image it must either use a public subnet and be assigned a public IP address or a private subnet that has a route to the internet or a NAT gateway that can route requests to the internet
So configure this setup, you need to do the following:
The following is just a steps paraphrasing of the AWS docs here
-
Choose (or create) a VPC, everything after will be down within this VPC
-
Create a subnet, name it xxx-public to indicate this will be your public subnet
-
Create another subnet, name it xxx-private
-
Create a NAT gateway, attach it with an elastic IP
-
Create an Internet gateway
-
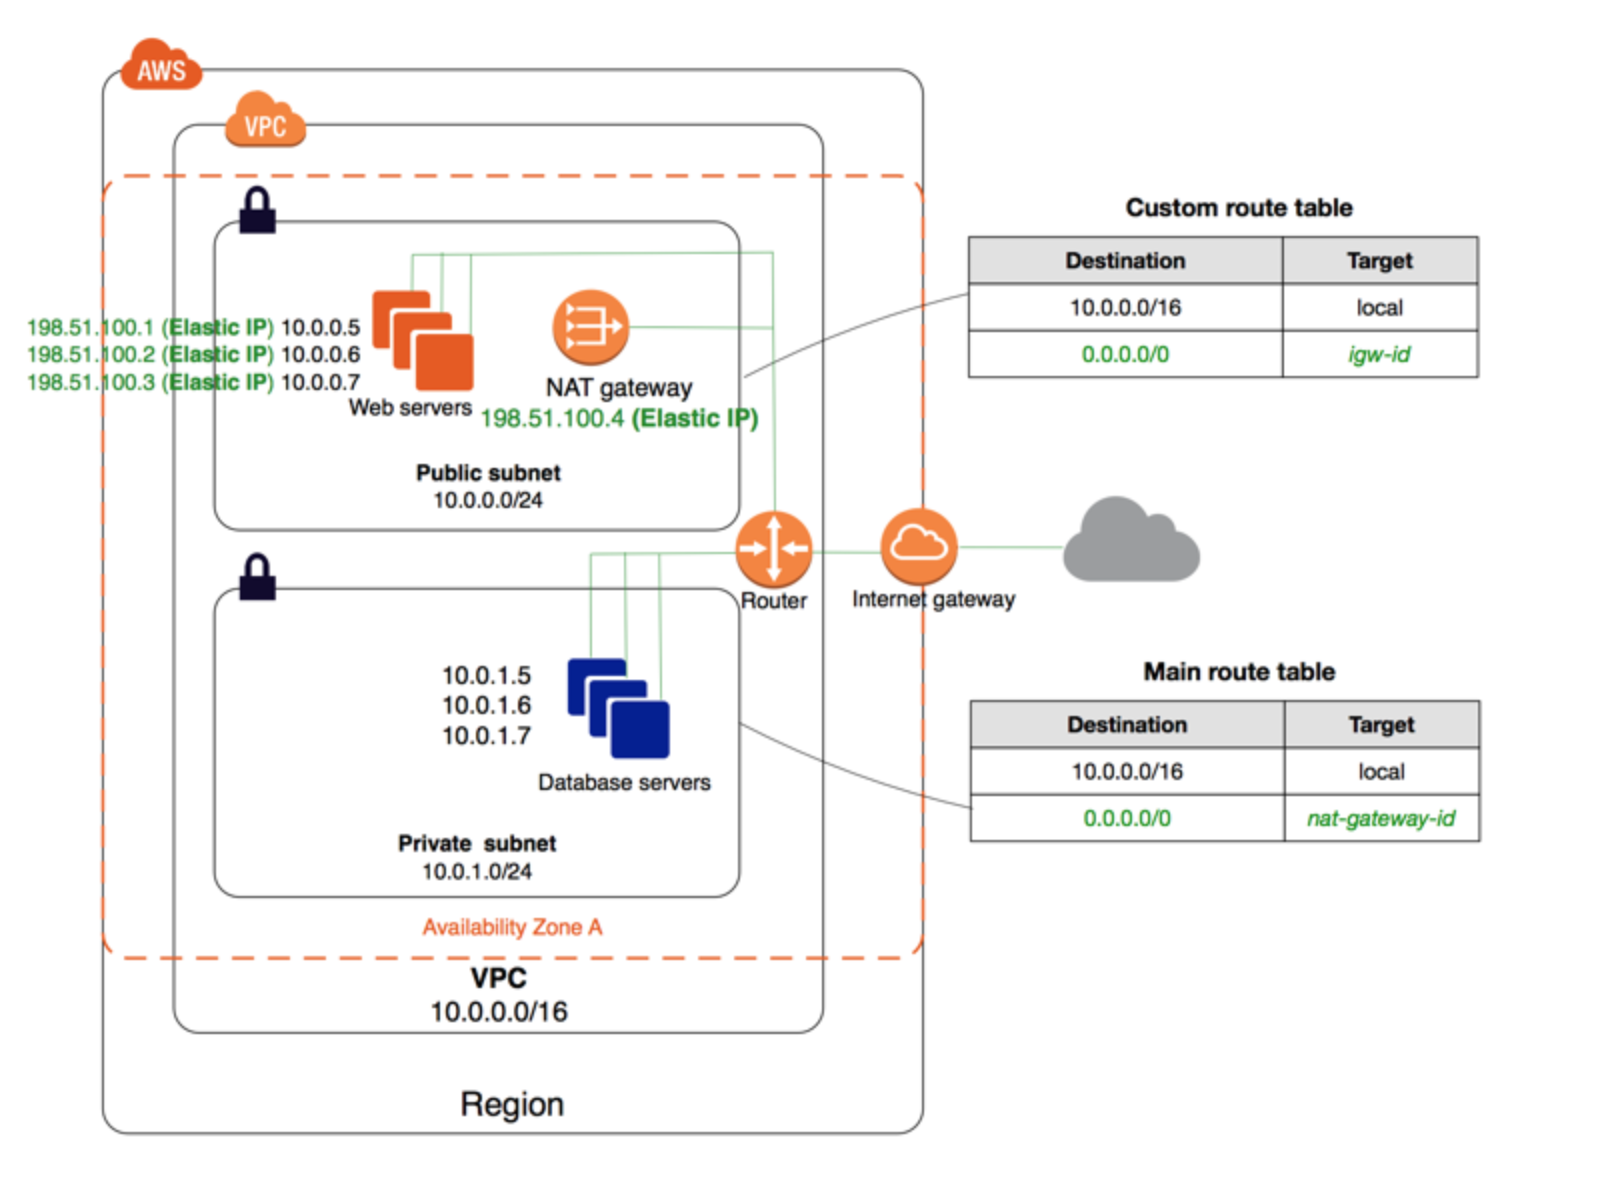
Create two route table, one routes internal requests to the NAT gateway (RT 1), one routes internal requests to the Internet gateway (RT2)
-
Associate (In
Route Tablesside tab,Subnets Association) xxx-private subnet to RT1 (Bottom subnet in the diagram above, where private servers reside in) -
Associate xxx-public to RT2 (Top subnet in the diagram, where Internet facing servers reside)
Launch applications in Fargate
After this is successfully setup, you can start to configure your Fargate SERVICE, yes once again the network layer is configured at service level, not task level.
There are three things in particular that require some attention if we want to disable the public IP, the rest is going to be as usual.
-
Selecting the appropriate subnets: Instead of randomly select your subnets or select across availability zones, you need to select the subnets that are attached to NAT, so you could
-
Disable your
Auto-assign Public IPoption in the settings, this will make your Fargate Task inaccessible and receive calls from the Internet -
Configure your ALB / NLB - This has to be in the public subnet and facing the IGW, so you load balancer could take receive HTTP requests and route them to the private Fargate instance
Conclusion
This is actually pretty easy if one understands how network works in AWS, and for those are not familiar with computing networks (like me), reading the AWS docs is enough to complete all these setups too.